As reliance on virtual communication grows, platforms like Zoom have become essential for connecting with others remotely. The service offers convenient features for hosting sessions, but there's often a need to refine these clips in video editor before sharing.
In this article, we'll explore how to edit a Zoom recording to elevate the quality and impact of your content. Through a step-by-step approach, we'll cover essential editing techniques such as cropping, merging multiple clips, and adding music and effects to enhance visual appeal and clarity.
Edit Zoom Video Online
With Video Candy, you can quickly and easily modify your recordings to suit your needs. Whether you're looking to trim down lengthy meetings, change the footage speed, or add captions for clarity, the Zoom video editor has you covered.
How to edit a Zoom video with Video Candy
- Begin by accessing the video editor.
- Upload your Zoom recordings either by dragging and dropping them into the window or by utilizing the "+Add File" button.
- Upon uploading your recordings, explore the array of editing tools at your disposal. Detailed information on each editing setting is provided below in our article.
- Review your edits by hitting the "Play" button.
- If you are satisfied with the result press "Export" and then "Download File".

Video Editing Options
Now it's time to make your edits!
Scene Settings:

- Rotate video: Easily correct any orientation issues in your footage to ensure a professional look when sharing.
- Flip video: Create a mirrored version of the original video.
- Video speed: Control the pace of your video, either speeding it up or slowing it down. Slowing down the video can be beneficial for presentations and tutorials, allowing viewers to absorb information at their own pace. Speeding up the video is ideal for condensing longer content such as lectures or interviews.
- Mute audio: Utilize the "Turn Off Sound" feature to remove unwanted noise from Zoom recordings, enhancing the overall viewing experience.
Common Settings:

Transition
- No Transition: Maintains the sequence without any alteration or addition.
- Fade to Black: Smoothly transitions from one video to the next without interruption. This option fades the video of one clip into the next, creating a seamless transition and the impression of a continuous shot.
Fit Size
- Black Bars: Automatically adjusts the video to fit your screen dimensions. Bars will appear on the sides or top and bottom of the video to maintain their original aspect ratio.
- Blurred Bars: Much like the Black Bars option, this feature scales the video to match the screen and fills any empty areas with a blurred rendition of the original image.
- No Bars: Selecting this option stretches or compresses the video without adding any extra elements. However, this may result in distortion and reduced quality.
Video Ratio
Adjust the aspect ratio of your Zoom video. Upon selection, you'll be presented with a range of dimension options. While "4:3" and "16:9" ratios are commonly used, you can also opt for "1:1", "9:16", or "3:4" for a more distinctive view.
Rotate all Scenes
This feature allows you to rotate all video feeds by ninety degrees with a single click.
Flip all Scenes
This instrument helps you mirror the orientation of all videos to the same perspective.
+Add Background Music
Enhance your recordings by incorporating a track that perfectly complements your event.
Mute Original Video
Eliminate any unnecessary noise from your recordings to ensure your audience remains focused during presentations.
Trim:

- Extract Segment: Choose a specific part of a recording for editing.
- Remove Segment: Quickly delete any unwanted portions of your video while preserving the rest.
- Cut Timing: Omit unintended components by customizing time frames.
- Audio Fade in/out: This utility facilitates for users to adjust the volume and make the audio sound better.
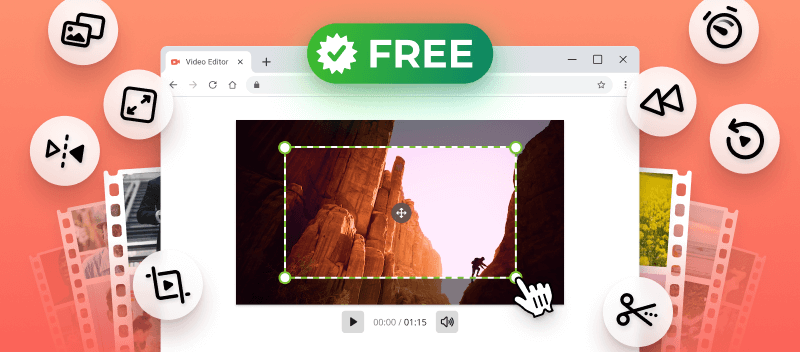
Crop:

- Width x Height: This capability resizes the Zoom recording's width and height, so it fits the size of the monitor or device.
Benefits of the free video editor:
- The tool is entirely free of charge.
- With its intuitive interface and powerful editing tools, you can quickly make all kinds of edits without having to spend hours learning.
- Compatible with a wide array of video formats, ensuring seamless compatibility with any uploaded file.
- Provides abundant customization options, including looping video, clip reversal, and more, all contributing to elevating the professionalism of your content.
- Compatible with all major operating systems (Windows, Mac, Linux, Android, iPhone) and browsers (Chrome, Mozilla, Opera, and others).
How to Record Zoom Video
1. In-build Zoom tool
Recording a Zoom meeting is an easy process. All you need to do is follow these steps:
- Open the Zoom app on your device and sign in.
- Navigate to the "Settings" tab. Choose "Recordings" from the menu.
- Activate the "Record Meeting" button by toggling it to the "On" position.
- Commence your meeting as usual, then click "Record" when you're prepared to initiate capture.
- When finished, click the "Stop Recording" button located at the bottom of your screen to conclude the session.
- Your recording will be automatically saved in the "Downloads" folder on your computer. Now you can proceed to edit your Zoom video or share it as desired.
Following these simple steps will guarantee that you record your Zoom meetings quickly and easily.
2. Online screen recorder
When it comes to recording Zoom sessions, there are several methods available, including various online tools. These web apps offer convenient ways to capture and preserve important discussions and presentations held on the platform.
In this guide, we'll focus on one such method:
- Open the screen recorder.
- Select the capturing sources: microphone, audio, webcam. Then, click "Start Recording" to commence.
- Determine the recording area by choosing from options such as browser, application window, or the entire screen. If you wish to include browser or program sounds, ensure to check the respective box. Finally, hit "Share".
- Your recording is now underway. To conclude, simply tap "Stop Recording".
- After stopping the shooting, you can either download the video or proceed to further edit it as needed.

Why edit Zoom recordings?
- Video editing allows you to refine the quality of your Zoom recordings by adjusting factors such as sound levels. This ensures that your content is clear, professional, and engaging for viewers.
- Recordings may include unnecessary segments, interruptions, or mistakes that can detract from the overall message. Editing gives you the ability to remove or trim these sections, resulting in a more concise and focused presentation.
- By editing out pauses, filler words, or redundant content, you can improve the flow and pacing of the clip. This keeps viewers engaged and maintains their attention throughout the video.
- Editing Zoom recordings enables you to incorporate additional elements such as graphics, text overlays, music, or visual effects. This will enhance the visual appeal and effectiveness of your recordings.
How to edit a Zoom video: tips
- Check everything before starting the recording. Verify that the microphone, camera, and speakers are correctly configured.
- Adjust the settings to enable the automatic recording of both audio and video.
- Trim unnecessary footage at the beginning and end of each clip in the Zoom video editor. This will make it easier to watch your recordings without any distractions.
- Split clips into separate ones if they contain multiple topics or conversations.
- Delete unwanted sections or add transitions between different clips if necessary.
- Experiment with various editing tools to enhance your recordings further and make them look better.
- Test the edited recordings by playing them back on several devices to confirm that everything looks as expected.
- Export the final version in a format so that you can play it easily on all devices.
FAQ
Can I eliminate background noise from the recording?
Yes, it can be removed using audio editing tools or transcript feature to isolate noise.
How do I add subtitles to my Zoom recording?
The app can automatically generate titles, but you can import your own manually if needed.
Can I highlight specific moments in the video?
Yes, annotations, text, or zooming in can help you emphasize key segments.
How to edit a Zoom recording: summary
Mastering the art of editing Zoom recordings opens up a world of possibilities for enhancing your virtual communication and collaboration.
By following the steps outlined in this guide, you can refine the quality, and impact of your Zoom videos to create polished and professional content.
Whether you're trimming unwanted segments, adding enhancements, or customizing content to suit your audience's needs, editing empowers you to make the most out of your digital meetings, presentations, or educational sessions.
So, take the time to explore the editing tools and techniques available.