Being familiar with how to combine videos on Windows can be a useful skill for creating video projects, presentations, or even just for fun. Whether you're making a movie from clips you took on vacation or putting together a presentation for work, connecting various video files is the best way to get the job done.
This article will help you understand how to use Windows 10 to merge your videos. You'll learn about the fundamental steps and the various techniques you can employ.
Combining videos could be an effective method to produce a unique and original video. If you're using Windows OS, there are several ways to join videos.
Method 1. Video Candy
Through the web-based service, multiple videos can be joined together into one. It's user friendly, plus it has numerous advantages that make it more desirable than other choices.
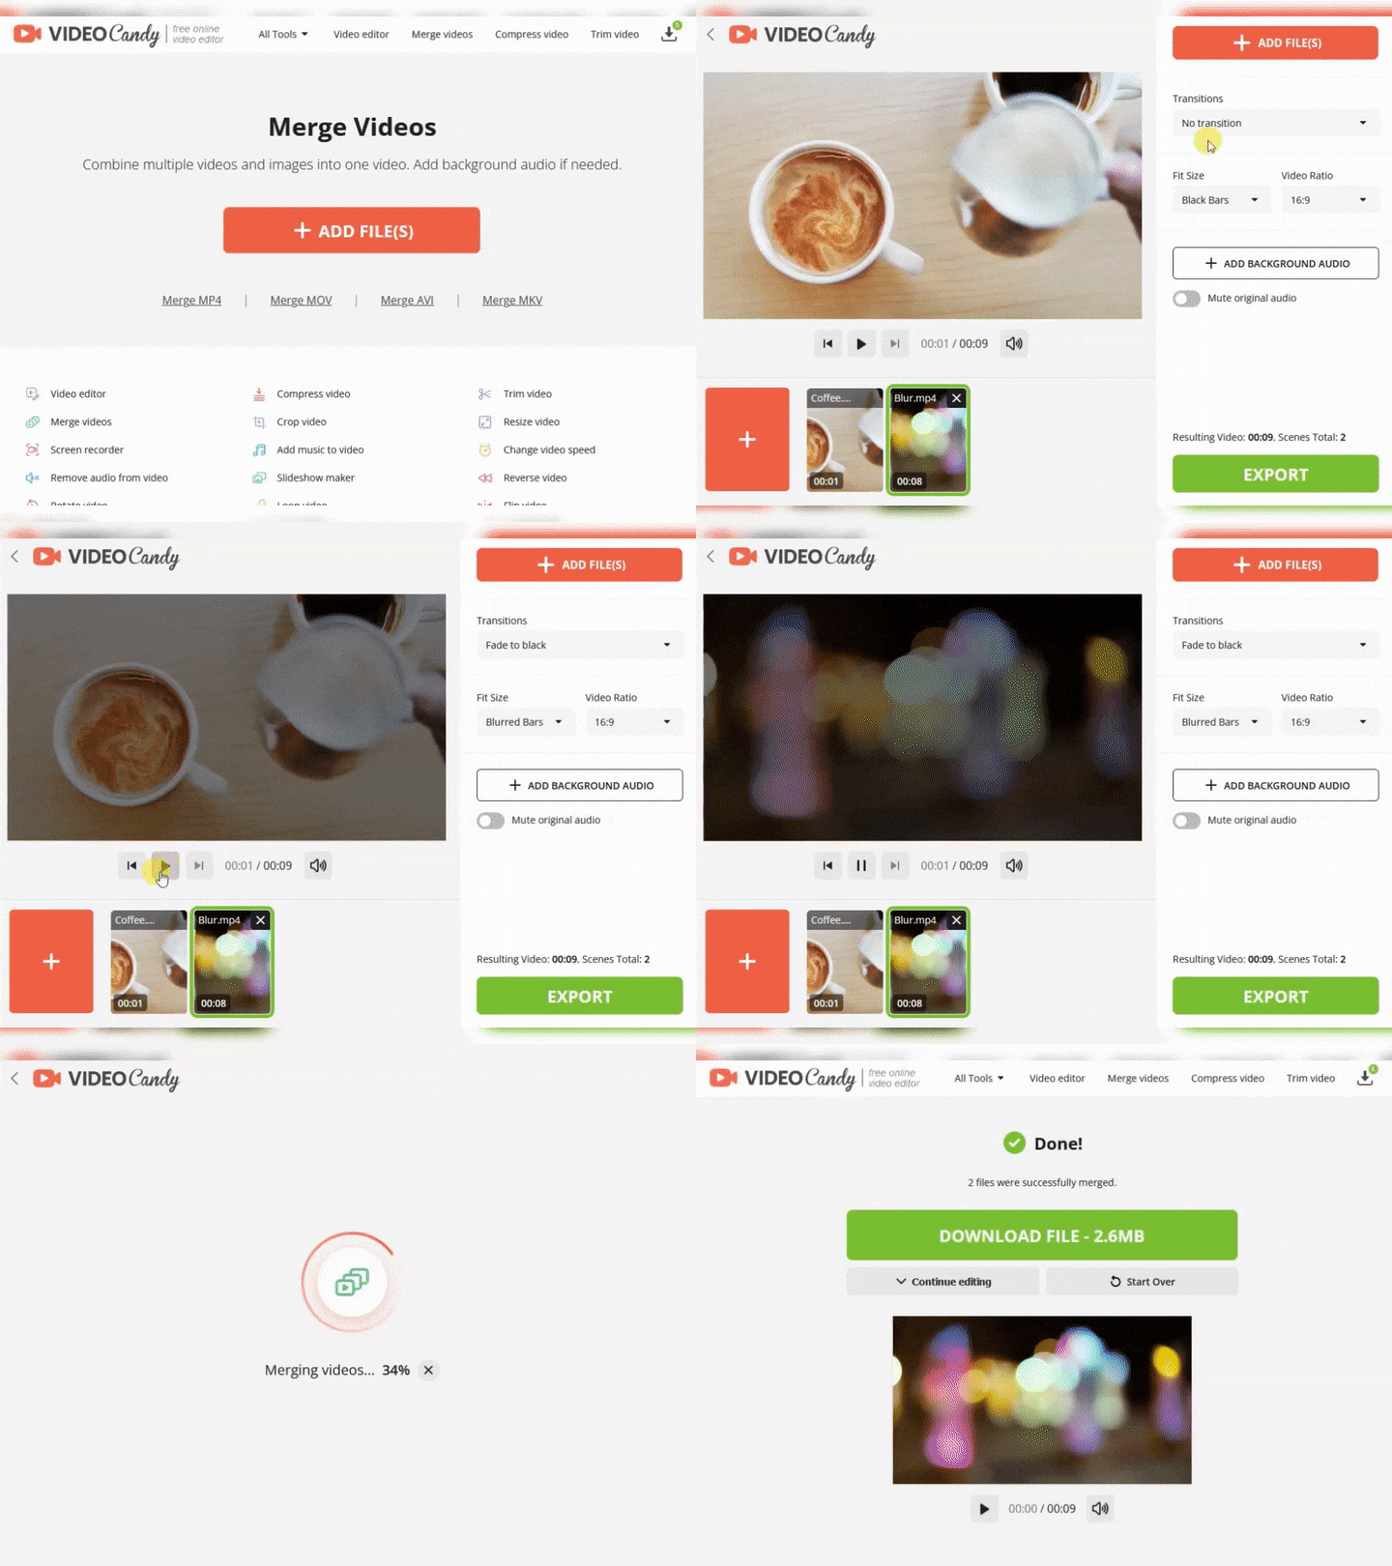
How to join videos in Windows with Video Candy
- Open to Video Merger.
- Upload the videos by selecting "+Add Files".
- Once uploaded, drag them into the order you want.
- Choose whether or not you want to fade to black by clicking on the "Transition" drop-down menu.
- Apply the bars. To choose between black, blurred, or no bars, click "Fit to Size". Don't forget to set the video ratio.
- Then add background music and silence the original movie if needed.
- Tap "Export" when all modifications have been made.
- Press "Download File" to save the combined videos.
Advantages:
- Compatible with Windows XP, Vista, 7, 8/10/11, MacOS, iPhone, and Android.
- No need to install additional applications or software to combine videos.
- Merge up to 100 files at once.
- Provides a variety of video tools to carry out editing tasks.
- Capable of processing video files up to 2 GB in size.
- Easily splices videos with an intuitive interface.
- Merging videos is fast and efficient.
- Combine movies and export them in high quality (MP4, AVI, MKV, MOV, WebM, and others).
- You can preview your video before you download it.
Method 2. Photos App
Windows 10 includes a free, built-in video splicer that facilitates putting videos together without costly software. Its simple interface and multiple features render it an ideal choice for video editing.
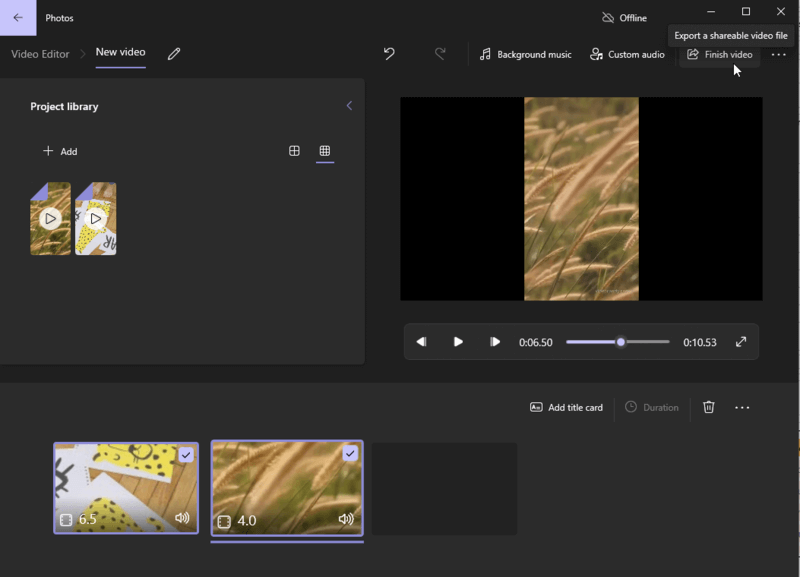
How to merge videos using Windows Photos App
- Open the Microsoft Photos app and click on the "Video Editor".
- Press "New video project".
- A new window will open where you can assign a video name.
- Click the "Add button" to select the videos.
- Tap "Place in storyboard" or drag and drop the elements.
- In the storyboard apply changes to the selected video.
- After click on "Finish video". Choose a resolution between 1080p, 720p, and 540p. Press "Export".
Pros:
- You may create a new video by selecting several clips from your library or adding them directly from a device.
- Video merger supports all the major video file formats, so you don't have to worry about compatibility issues.
- Integrates with OneDrive.
Cons:
- No preview.
- The Microsoft app only allows you to export your videos in MP4 format. It is not possible to save them in other formats.
- Does not provide any audio controls.
Overall, the app is a great selection for joining videos on Windows. It is convenient to operate and provides enough features for most basic editing tasks. However, you may want to consider another video editor if you desire more control over your output options.
Method 3. Movie Maker
Are you trying to amalgamate videos in Windows 10? Look no further. Movie Maker serves as a great resource for editing videos. It makes standard video editing, including merging videos, easy.
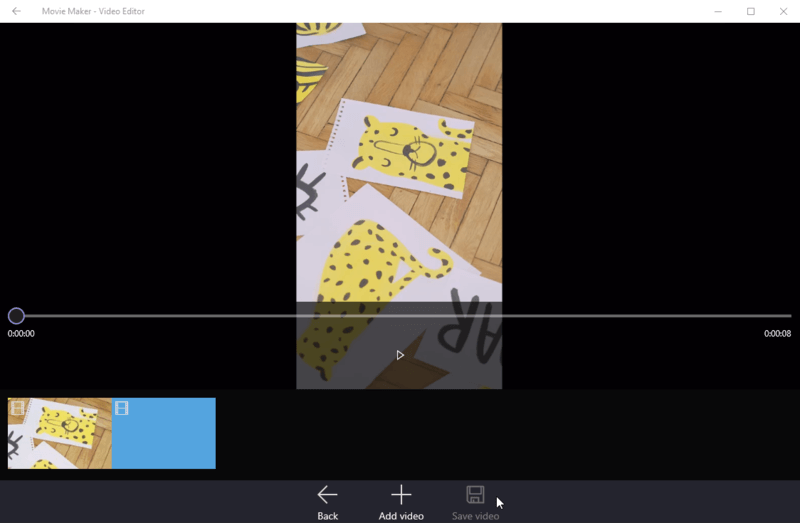
How to combine videos in Movie Maker
- Open Movie Maker and choose "Join video" from the home page.
- Select the videos you plan to combine and click "Open".
- The video clips will now show up in the storyboard below.
- Drag the clips into the desired sequence.
- When you're done, click "Save Video" at the pinnacle of the screen and choose your desired output format, MP4 or WMV. Press "OK".
- Enter a title for the movie and press "Save" to produce your blended video file!
Pros:
- The user interface is uncomplicated, at the same time tool has more than 130 editing effects.
- No need to spend money on extra features or upgrades since it's free.
- You can choose video resolution, encoder, and bitrate.
Cons:
- While Movie Maker has useful features, the program has no audio customization.
- There is no official support from Microsoft or any other company.
- Lack of tutorials: While there are guides available online, they are not as comprehensive as those offered by paid tools.
Overall, Windows Movie Maker is an excellent choice for easy video editing tasks such as to stitch videos together. It offers an easy-to-use interface and plenty of functions that render it perfect for creating great videos. However, if you want additional advanced features or assistance, or support then you will need to look elsewhere.
Method 4. VLC Media Player
Merging videos with VLC can be an excellent way to assemble a single, longer video file from several smaller ones. This is especially useful if you wish to create a montage or mashup of videos.
How to combine videos on WIndows 10 in VLC Media Player
- Open Media Player on your Windows machine.
- Select the "Media" tab at the top of the window, then choose "Open Multiple Files" from the drop-down menu.
- Click "Add" and browse for the videos to incorporate.
- Once all videos are added, select "Convert" from the Media tab.
- In the Convert window press the "Browse" and set the location.
- Tap "Start" to merge files.

Pros:
- Ability to merge a bulk of files into one large file quickly.
- Supports a variety of video formats including AVI, MP4, MPEG, WMV, and more.
- Offers a variety of editing features.
Cons:
- Requires installation.
- It is only possible to join video files from the same format into one file.
- Audio and video quality may be degraded when merging files.
Method 5. Adobe Premiere Pro
Adobe Premiere Pro is an effective video merger employed by both experienced and inexperienced users. It's available for both Windows and Mac users. But in this article's part, we'll discover how to combine videos on Windows 10.
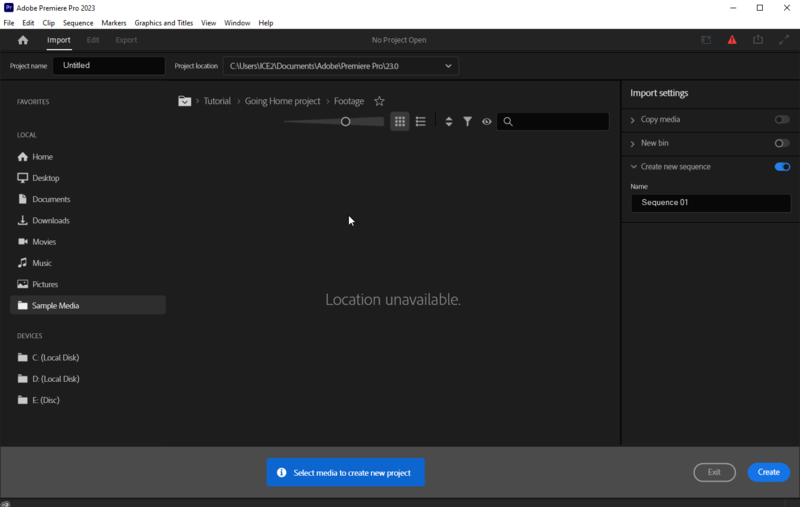
How to stitch two videos together Using Adobe Premiere Pro
- Open Adobe and go "File" > "New".
- Select "Import" in the Project panel, and choose the clips.
- Drag and drop the video files to the timeline situated beneath the window.
- Arrange the video clips as desired.
- Choose the videos to be joined by holding "Shift" and pressing on the videos.
- Right-click on any of the selected clips and tap "Nest" from the dropdown menu.
- Enter the name and tap "OK".
Pros:
- Professional-grade tools. Premiere Pro provides an array of tools, including audio editing.
- Non-linear video editing is possible.
- Big collection of in-built effects and transitions.
Cons:
- Costless only for 7 days.
- The software is relatively easy to use. However, it can be quite complex to master all the features and tools available.
- Program crashes when you start working with large files.
Overall, Adobe is the ideal selection for those wanting to link videos in Windows 10. It suggests strong editing tools and a flexible workflow, although the cost may be prohibitive for some users.
Method 6. Movavi Video Editor
Are you looking for a hassle-free method to splice videos in Windows 10? Look no further! Making use of video combiner provides outstanding software that will enable you to achieve the perfect result. It's easy to use and offers lots of features to assist with a speedy completion.
How to merge videos on Windows with Movavi Video Editor
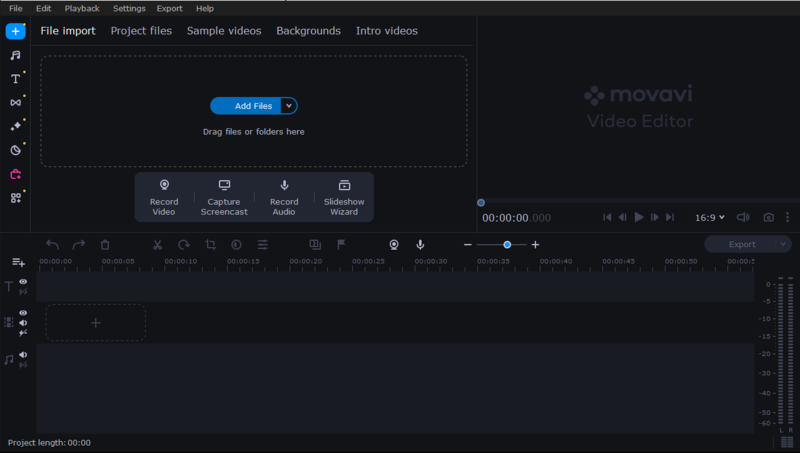
- Install Movavi Video Editor on your PC.
- Launch it and click "+Add Media"> "Add video".
- Drag and insert each video clip in the timeline one after another. Move the clip to its desired position if needed.
- When you're satisfied with the order of the clips, click "Export" to save your merged video.
Pros:
- Easy-to-use interface makes editing videos simple.
- Accommodates a broad selection of file formats, from MP4 to MOV and more.
- Has powerful editing tools such as motion tracking, speed changing, subtitles, and so on.
Cons:
- Paid software so there's an upfront cost.
- It may take time to render heavy files.
- Limited customization of effects.
Ultimately, Movavi Video Editor is the optimal option for splicing videos on Windows. Its many features make it straightforward to produce videos quickly. The cost is a little steep for some people. But if you're serious about video editing, it's well worth investing in this powerful piece of software.
7. Joyoshare VidiKit
Joyoshare VidiKit is an awesome video merging tool for Windows 10 users. It can rapidly and easily merge multiple videos into one larger video without losing the original quality or effect.
How to combine videos using Joyoshare VidiKit
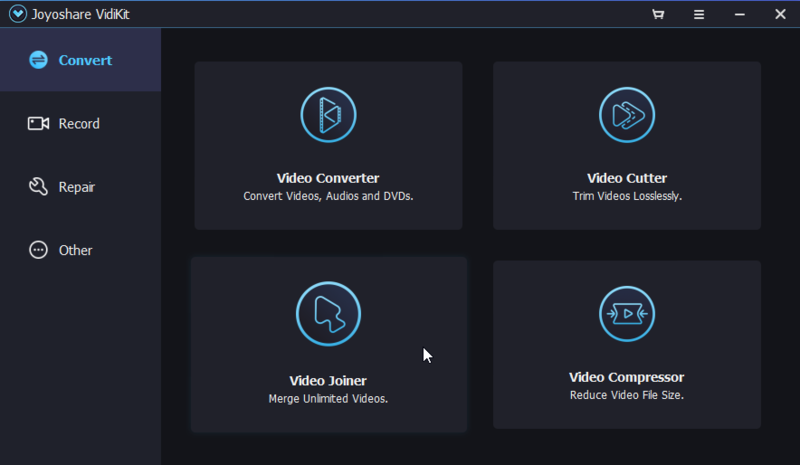
- Download Joyoshare on your Windows 10 computer.
- Once installed, start the program and press the "+" button to import the videos you wish to combine into one.
- Choose the editing mode according to your abilities.
- If necessary edit the video and re-arrange the order. Click the "Convert".
Pros:
- Supports a wide range of video formats, including MP4, AVI, MOV, and others.
- Processes video files fast and efficiently, enabling users to combine videos with minimal effort.
- Produces high-quality merged videos that look great on any device.
Cons:
- Additional costs associated with using the premium features.
- The free version offers a good selection of video editing features. Advanced tools, such as green screen effects, are only available in the premium version.
- Users have reported compatibility issues with certain devices or operating systems.
8. VSDC Video Editor
VSDC Video Editor is a perfect option for those who need to know how to splice videos together. Follow these steps:
How to join videos together in VSDC Video Editor
- Download and install VSDC Editor from their website.
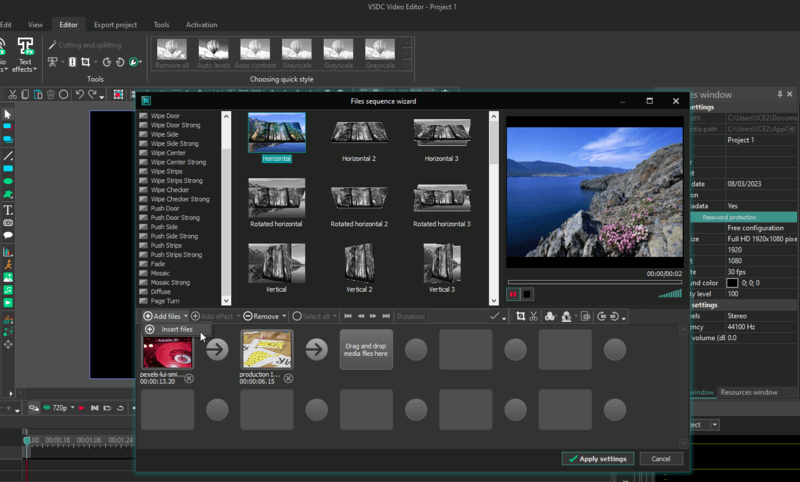
- Open the software and go to "Create slideshow".
- Press the video icon to add videos.
- In "Files sequence wizard" select the transitions. Tap "Apply to set".
- In Export tab press "Export project".
Pros:
- Lots of features. It can do basic and advanced video editing tasks.
- It supports many popular video formats like AVI, MP4, WMV, MOV, FLV, etc.
- No watermark. Rest assured that unsightly watermarks on your merged video.
Cons:
- No tutorial and not beginner-friendly.
- No preview window.
- Low video quality and no stabilization.
- It isn't compatible with Mac or Linux operating systems.
In conclusion, if you're looking for a straightforward option to join videos without spending any money, VSDC is an optimal choice. However, it is essential to weigh up its pros and cons before making a decision to ensure that it meets your needs.
Why merge videos on Windows PC?
Combining videos is an excellent technique to generate a more unified and refined end product. Here are some reasons why you should consider it:
- Putting two or more videos together can help create a more comprehensive story.
- If you have multiple clips that are related, merging them together can make the narrative easier for viewers to follow.
- Stitch videos together to keep your video project organized and manageable.
- It can save time by avoiding the need for separate edits.
- By compiling videos, you can add transitions or special effects between different clips.
- You may also add background music or mute if you wish.
- Merging two videos together is a great way to create a montage that highlights your best shots and moments.
- At last, using a video splicer provides an ideal solution for sharing clips in one post without having to individually edit each one.
How to combine videos: tips
- Back up files prior to joining videos. This will help you avoid any data loss in case anything goes wrong during the process.
- Organize files in a single folder so that it is easier to find and select them for merging.
- Check the resolution of all your videos before merging them, to confirm they are compatible.
- Choose the desired output format of the joint video; the service provides support for many formats.
- Put the correct settings for your merged video file based on its intended purpose (e.g., for viewing on a computer or playing on a TV).
- Test-run the merging technique with small video clips to ensure everything works as expected before merging the whole clip.
- Save a copy of your finished product in a secure location in case you need to edit or re-use it later on; having copies helps if something happens to one of them (e.g., accidental deletion).
FAQ
1. Can videos with different resolutions be merged?
It can be done, but mismatched resolutions may distort the image. It's best to resize them beforehand.
2. How should I deal with varying frame rates?
To prevent playback issues, ensure all clips have the same frame rate before joining them.
3. Can transitions be added between clips?
Absolutely, transitions can smooth the shift from one clip to another, enhancing the viewing experience.
4. How do I handle audio when merging videos?
Tracks from each clip will either combine into a single one or overlap, depending on the editor's settings.
5. Does splicing videos change their bit rate?
The process typically does not alter the bit rate unless the output file is re-encoded. If these occurs, the bit rate can be adjusted, which may result in either a higher or lower final quality.
How to merge videos in Windows 10: summary
To conclude, merging videos in Windows is an easy process. The most important step is to verify you have the necessary software and hardware to get started.
Once that's done, it's time to collect the files you want to merge and use the appropriate video joiner to put them together. It's important to take your time and make sure everything is in the right place. This can affect the overall quality of the merged video.
Finally, don't overlook converting your final product in the desired format so you can share it with others. With these tips in mind, you'll be able to successfully merge videos in Windows like a pro!


