Are you searching for techniques on how to record a video on your Mac? If so, you have come to the right place.
Screen recording on Mac is great for producing instructional videos and slideshows. Instead of trying to explain something verbally, you can demonstrate precisely what needs to be done by recording your screen and guiding them through each step of the process.
This article will provide tips for Mac screen recording utilizing 4 methods: 2 online screen recorders and 2 desktop Mac screen recorders.
By the end of this guide, you should have a better understanding of capturing screen video on your Mac. Hence, you will be able to create high-quality videos for yourself or for sharing with others. So let's get started!
Video Candy
This web-based video recorder and editor offers many options to work on your video, including the functionality of Mac video recording. Here is the guide on how to record on Macbook or iMac what is going on on your screen.
How to screen record on Mac with Video Candy
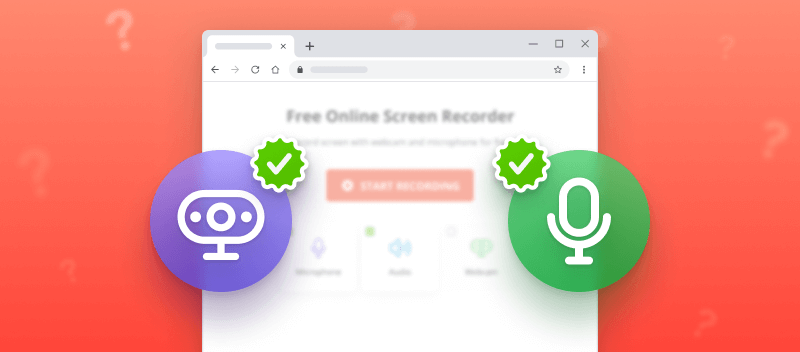
- Open the online screen recorder with the Google Chrome browser.
- Allow the Microphone, Audio, and Webcam access by checking the boxes next to the corresponding icons.
- Hit the "Start Recording" button. In the pop-up window, choose what you wish to record: "Chrome Tab", "Window", or "Entire Screen".
- Check the box "Share tab audio" if you need to include the sound in your recording. Click "Share".
- Your recording is in progress. Once you are finished, tap the "Stop Recording" button.
- Download the file to the desired location.

Now that you have your Mac screen recording ready, it is time to start editing! And you can do it with the same online video editing platform. On the website's main page and choose the further action: trim or flip your video, add a voiceover or background music, and more.
Pros:
- Affordable. You can screen record on your Mac for free.
- Fast setup. No need to install a desktop Mac screen recorder or an extension to your browser/computer - you can start recording your screen right away.
- Compatibility. The service is compatible with iMac, Macbooks Pro, and Air with different versions of iOS.
- Supports audio and web camera. The platform allows you to record the audio and video from web camera in the Chrome tab you are recording.
- Easy sharing. The Mac screen recording can be shared directly from the service. You can also choose to compress the file before downloading it.
- No watermark added. After you finish screen recording on Mac, there will be no watermark placed on the final video.
- Flexible editing options. You can edit your recordings within the website - it offers tools to crop, rotate, flip, fast forward your video, and more.
Whether you are creating tutorials, live streaming, or recording presentations, Video Candy facilitates Mac users to capture and edit their screen recordings quickly and efficiently. Once you try how to video record on Mac with this platform, you will wonder why you ever used anything else!
Loom
Are you searching for a straightforward method to capture your screen on a Mac? Loom is a great choice to screen record your Mac's display videos.
How to record screen on Mac with Loom online screen recorder
- Open the website and sign up for an account. To record your Mac screen online, select the option "Add Chrome Extension".
- Download the extension installation file.
- Once the installation process is complete, hit the button "Record". Make sure to allow access to your camera and microphone.
- Confirm what content will be shared in the pop-up window. Wait for the countdown to begin Mac screen recording.
- When you are done recording, press the stop icon at the bottom of your screen.
- In the new window, choose the way you wish to share your recording: get a link, upload it to a social media platform, or embed it on a website.

And this is how to record a video on Mac utilizing the browser extension. With this platform, if you are filming a lesson or a lecture, you can add annotations to the video you recorded. Additionally, you can leave comments and further edit your video.
Pros:
- The website is simple enough for anyone to learn and offers hints as you proceed through recording steps.
- The service is free for personal use, making it an affordable choice for screen recording on Macs.
Cons:
- You cannot download the resulting file in the free version of this screen recorder for Mac.
Online video editing platforms are becoming increasingly popular. They allow people to create and edit videos online with ease. Loom is a useful tool for those looking for methods how to record a video on Mac.
It allows you to quickly record and share your screen or webcam with colleagues, friends, or family.
QuickTime Player
This is a default Apple program that offers a feature to screen record on your Mac. Read the guidelines to learn what you need to do to use this software as a Mac screen recorder.
How to record a video on Macbook or iMac with QuickTime Player
- Open the media player. Go to the "File" menu and pick "Record Screen". Give the app permission to record your screen in the System Preferences.
- A small window will appear with a red button at the bottom. Click the button to begin recording.
- Select the area of your Mac screen that you desire to take. You can choose to record the entire screen or just a portion of it. Click on the "Start Recording" button in the small window.
- Now you can start your Mac screen recording. Upon completion of recording, just go back to the app and hit "Stop" on the toolbar at the bottom of your screen.
- Once you finished capturing the necessary information, hit the icon with a square in the toolbar on the top right part of your screen.
- Find your recording in the "Recent" files on your Mac.

This process will teach how to screen record on Mac easily and with the tools already existing on your computer. After you recorded your screen, you surely will want to share it with others. check out how you can easily compress the video for email and distribute your file to students or friends.
Pros:
- It is a built-in application, so additional Mac screen recorder installation is required.
Cons:
- The support of the media player is currently discontinued.
Making use of QuickTime Player as a screen recorder for Mac provides an opportunity to catch your work with a simple media player that many are used to. After a little time spend to learn the feature, you will master screen recording on Mac with this program.
OBS Studio
Are you trying to discover a basic technique to record your monitor on a Mac? Open Broadcaster Software is a popular, open-source video recording and streaming application that enables capturing and broadcasting of your screen with ease. In the provided guide you can see how to take a video on a Mac with this method.
How to record screen on Mac with OBS
- Download the software's Mac version from the official website and install it on your computer.
- Open the application and "Review App Permissions". Make sure to grant access to camera and microphone to allow to screen record your Mac display. Hit "Continue".
- Now, you need to customize the "Auto-Configuration Wizard". Set your preference to "Optimize just for recording". Click "Next".
- Set the "Video Settings" by specifying the resolution and FPS. After the testing is complete, select "Apply Settings".
- In the menu "Sources", click the "+" button to select the new video source. Choose the "Display Capture" option. Allow the software to record your Mac's screen.
- Open the window you wish to record and click "Start recording". Once finished, hit "Stop Recording".

With a few clicks of a button, you can quickly capture high-quality videos of whatever is displayed on your screen! After using this method to screen record on Mac, you can combine several videos into one to create high-quality study materials.
Pros:
- The software offers various Mac screen recording options, from fullscreen to specific windows or areas of your screen.
- You can stream directly to Twitch, YouTube, Facebook, and other popular streaming sites.
Cons:
- The program has a powerful but complicated interface which can be challenging for beginners.
- Relatively large installation and application files.
- This screen recorder requires macOS 11.0 or later.
OBS lets users to complete screen recording on Mac or live stream to a social network site of their choice. If you are a proficient user in the world of technology, this could be a helpful tool for recording your screen and other work related to video making and streaming.
Benefits of an online screen recorder over offline one
Employing a web-based tool as a solution to how to screen record on Mac is an easy and efficient way to document your computer activities. It allows you to capture anything from a tutorial to a presentation, or even a video game. Listed below are some of the advantages of using an online service to record your screen:
Ease of use. Screen recording your Mac display through an online platform is a quick and simple process. You don't have to worry about downloading any software, as you can access it right away from the website.
Time saver. With a few clicks, you can record the whole thing in one go. This saves you time from having to pause and re-record different parts.
Cost effective. Many online screen recorder for Macs offer free versions with basic features that you can use without spending any money.
Shareability. You can easily share what you have recorded online after the recording has finished. This makes it ideal for creating tutorials and presentations for others to watch.
Knowing how to record video on Mac with a website is a great way to capture what you are doing on your computer quickly and easily. With its benefits, it is no wonder why many people are turning to this method for capturing their work. Let's look at some examples of online screen recorders.
Advantages of a desktop screen recorder for Mac
Capturing your screen through a desktop Mac screen recorder is an excellent way to generate captivating exciting content for your instructional videos. These are some of the chief benefits of using a desktop app to capture your screen:
Flexibility. Desktop applications give you the flexibility to screen record on Mac whatever and whenever you want as you do not depend on the Internet connection.
Stability. Desktop applications have far greater stability compared to those on the web. This means that your recordings will be more reliable and won't be interrupted by unexpected connection issues.
Security. The web-based Mac screen recording services offer secure file processing. However, being able to work with files offline and save them directly to your PC ensure the highest level of information protection.
Overall, utilizing desktop software for screen recording ensures that you get the best quality footage, without fear of worrying about unexpected crashes or errors ruining your videos. Below are two software that you can use to screen record your Mac's display.
FAQ
Is it possible to add a voiceover in my screen recording?
Yes, you can enable microphone audio in the screen recording options to include a voiceover.
What is the maximum duration for a single recording session?
There's no strict limit, but longer recordings may consume more disk space and system resources.
How much disk space does a screen recording typically consume?
The size can vary based on factors like resolution, duration, and compression, but a typical recording might consume around 1 GB per hour of footage.
What is the recommended resolution and frame rate?
The default parameters are the native resolution of your display. The standard frame rate is 30 frames per second (fps).
Is it possible to record in 4K resolution on Mac?
While offline tools offer more consistent support for HD capture, many online services also provide 4K support. However, web-based platforms depend on the browser's performance and your internet speed.
How to record video on Mac: conclusion
Now you learned how to screen record on your Macbook or iMac. It is an easy and user-friendly process. The videos you record can be used for a variety of purposes: sharing online, posting on a teaching platform, or further editing together with other parts of a production.
Following these simple steps will help you perform Mac video recording with ease!