As Apple grows its army of customers, more macOS-orientated tools have been developed. For example, users seek apps to capture their digital experiences.
Whether you're a tech-savvy professional, a creative content maker, an instructor of some kind, or a pro-gamer, having the right screen recorder is crucial.
In this article, we'll explore five approaches, each catering to different preferences and needs. From the built-in native options to third-party applications and even online tools, discover how you can seamlessly screen record on Mac with audio.
Online Screen Recorders
Using an online tool to screen record with sound on Mac is convenient and accessible. It eliminates the need for complex software installations, providing an efficient way of capturing display activities.
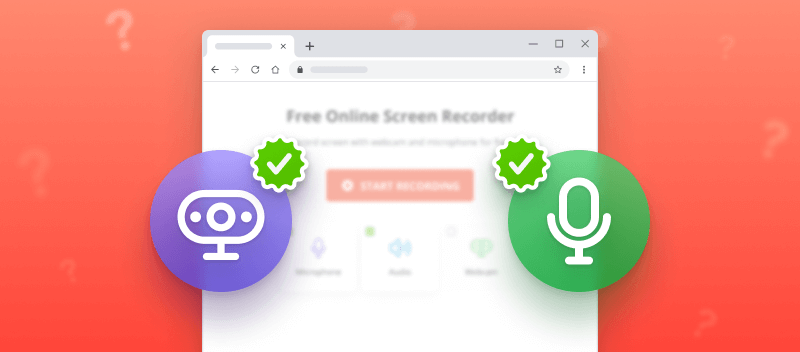
Option 1. Video Candy
Video Candy is a free online editing platform that offers many tools, including the screen recorder. With this service, you will be able to capture your game or webinar video along with a good quality sound.
How to screen record with sound on Mac with Video Candy
- Go to the online screen recorder.
- To capture your screen with audio, make sure you hit the check mark next to the "Microphone" option. Select "Webcam" if you also need to film yourself.
- Once you are all set, click the "Start recording" button. Allow Video Candy to capture your screen in the pop-up window and select which web tab or display you want to record.
- Once you are done, press "Stop recording". Now, you can download your video.

Pros
- Simple UI. The interface is user-friendly and easy to navigate, making Video Candy perfect for beginners.
- Good Quality. It creates high-definition recordings for both, video and audio.
- Free to Use. No need to worry about any extra cost incurred from purchasing expensive software or subscriptions.
- Selection Options. The platform gives users full control over their recordings such as selecting which part of their screen to capture.
- Web-Based Tool. The recorder functions completely online, so you can use it on the go.
- Versatile Editor. There is an option to edit your video right on the web: trim, rotate, fast-forward your video, and more.
Option 2. Loom
Loom is a video-sharing and screen-recording platform. It allows users to capture their screen, webcam, and microphone. This tool is often used for creating tutorials, demonstrations, and collaborative videos.
How to record screen and audio on Mac with Loom
- Go to the website and sign up for an account if you don't have one already.
- In the main tab, click "New Video" and choose "Record a Video".
- Give the program permission to use your webcam in case you want to record yourself. When ready, click "Start recording".
- To end the recording, hit the red stop icon or use the hotkey combination Command + Shift + L.
- Within your Loom profile, you can access, edit, and share your video.
.png "Screen record - audio on Mac with Loom")
Pros:
- User-Friendly Interface. Loom offers a clean interface that's intuitive to use.
- Seamless Audio Recording. The website provides a smooth experience for recording both screen and audio simultaneously.
- Reliable Performance. The tool is known for its stable and reliable performance, ensuring a consistent recording experience without major glitches.
Cons:
- Limited Editing Tools. Loom's editing capabilities are somewhat basic, lacking advanced features compared to a more robust video editing app.
- 5-Minute Limit (Free Version). The free version of Loom imposes a 5-minute recording limit, restricting users who need longer videos.
Option 3. RecordCast
RecordCast is a cloud-based, browser-oriented screen and webcam recording tool designed with simplicity and versatility in mind. It is tailored for creators, educators, marketers, and professionals who need a streamlined solution for creating high-quality content.
How to record screen Mac with audio
- Follow the link. On the homepage, click the "Record Free Now" button to begin.
- Choose the mode. You’ll be given several options:
- Screen Only.
- Webcam Only.
- Screen + Webcam.
- Press "Next Step". The platform will request access to your screen and/or camera.
- Once access is granted, pick audio settings. Hit "Start Recording".
- When finished, stop the capture.
- Download the video to your computer.

Pros:
- No Account Needed. Users can begin the process immediately without the requirement of signing up.
Cons:
- Limited Formats. Exports are restricted to MP4 files, which may not be ideal if other extensions are needed for projects.
- Time Constraints. The free version has 5 minute time limits, which could be restrictive for longer videos.
Native Mac Options
Opting for a built-in macOS screen recording tool ensures simplicity and complete integration. Users don't need to use any additional programs, which can be quite expensive for Apple devices.
Option 4. QuickTime Player
QuickTime Player is a multimedia player and framework developed by Apple Inc. It is used on macOS for playing various audio and video files but also has screen recording functionality.
How to screen record on Mac with audio using QuickTime Player
- Open QuickTime Player on your Mac.
- Click "File" in the menu bar and select "New Screen Recording".
- If you have multiple screens, click on the one you want to record when the camera icon will be on the needed display. Recording will begin automatically.
- To end filming, click the stop icon on the toolbar at the top of the screen.
.png "How to screen record with sound on Mac - QuickTime Player")
Pros:
- Built-In Tool. QuickTime Player is a native application on macOS, so there will never be compatibility issues.
- Free of Cost. It comes pre-installed with macOS, making it a cost-effective solution for basic screen recording needs.
- Simple Interface. The program has an uncomplicated interface with tools being easily found.
Cons:
- Limited Features. While it's great for basic screen recording, the app is designed as a media player and that's what it does the best.
Option 5. Screenshot Toolbar
Mac screen recording with audio can be done even without using any app or online platform at all. If you need just the video capture with no editing and no additional features, use the simple built-in Screenshot toolbar.
How to screen record with sound on Mac using toolbar
- Open the "Screenshot toolbar" by pressing Shift + Command + 5.
- Select either "Record Entire Screen" or "Record Selected Portion", depending on what you need. Through the "Options" menu, you can also set the "Timer" from 5 to 15 seconds before your recording begins.
- Click "Record" and pick the display to film if you have multiple. Wait for the countdown if you've set the timer to commence capturing.
- To finish recording, click the stop button in the menu bar at the top of the page. Your video is going to be stored in your "Desktop" folder as a MOV file.
.png "Mac screen recording with audio - Toolbar")
Pros:
- Accessibility. The screenshot toolbar can be used immediately without the need to open any program.
- Integration. It ensured seamless blending with the operating system.
- Resource Efficiency. This built-in widget is lightweight, so there is no extensive system resource usage.
Cons:
- Limited Features. Recording with this tool lacks advanced functionality and customization options.
- No Editing Capabilities. You won't be able to edit your video.
Third-Party Screen Recorders
Choosing a third-party program to record screen on Mac with audio provides advanced features and customization. These apps often offer editing options, varied output formats, and additional functionalities.
Option 6. OBS Studio
OBS Studio is a powerful open-source software that facilitates you to record your screen including sound on a Mac. It's completely free to download and has all the features you need to capture display activities with sound. Plus, you can stream live videos directly from the program.
How to use OBS Studio to record screen on macOS
- Download and install the software on your computer.
- Click "+" in the "Sources" field and add your web camera, microphone, and other media input devices.
- Hit "Start Recording" once all the settings are chosen.
- To finish screen capturing, click the "Stop Recording" button.

Pros:
- Advanced Features. OBS Studio offers a plethora of features for customizable and professional screen recording.
- Multi-Platform. It's not limited to macOS screen recording, being available to users across different operating systems.
- Powerful Editing. The app has robust post-production capabilities for refining recorded content.
- Open-Source. Being open-source, it's free and has an active community for support and development.
Cons:
- Learning Curve. The interface might be overwhelming for some users and require time to learn.
- Resource Intensive. OBS Studio can be demanding on system resources during recording and streaming.
- No Tech Support. As open-source software, it lacks direct customer support.
Option 7. TapRecord
For talks of screen recording on Mac with audio that require basic functionality, you can use one of the programs provided in the App Store. For example, a simple but capable TapRecord.
How to screen record with sound on Mac with TapRecord
- Download the program from the App Store. Open it.
- Click "Record Screen" and give the permission to record your display, microphone, and webcam (if needed).
- Select the area to be recorded with your mouse or trackpad or enter the values manually into the "Size" field.
- On the toolbar, make sure that the microphone icon is not crossed, meaning that the app is set to record. Similarly, if you need to capture a webcam or system sound, click the corresponding icon to allow it.
- When ready, hit the red record button. There will be a countdown before the recording begins.
- To end the capturing, hit the red stop button.
- In the new window, you will be able to preview your video, trim it, open its location, delete, send to iPhone, or share.

Pros:
- Simple and Intuitive. The program has a straightforward interface, so it's easy to navigate.
- Trimming Option. You can trim your recording right after you film it if need to make adjustments quickly.
- Sharing Directly from the App. Within the recorder, there is a feature to send the recording to your iPhone or share it with others.
Cons:
- Free Version Limits. To record in HD quality, with no watermarks, time limit, and ads, you will have to purchase a license.
Built-In vs Online vs Third-Party
Choosing a method for macOS screen recording is important as you must the right tool for your specific needs. Below, we explore the key features and considerations of the three recording options we discussed.
| Criteria | Built-in Tool | Online Screen Recording Tool | Third-Party App |
|---|---|---|---|
| Ease of Use | Simple | Usually user-friendly | May have a steeper learning curve |
| Flexibility | Limited to Mac | Cross-platform compatibility | Often available on multiple OS |
| Features | Usually no additional features | Varies, may lack advanced options | Often offers extensive features |
| Editing Capabilities | Usually no editing | Varies, may be limited | Basic to robust post-production capabilities |
| Use Cases | Quick and simple recordings | Convenience and platform independence | Professional-level recording and streaming |
Tips on getting the best audio quality
Ensuring the best sound quality when you screen record on Mac with audio involves attention to various factors. Here are some tips to enhance the audio quality.
Check Audio Settings:
- Verify that your chosen screen recording tool is set to capture the correct audio input.
- Confirm the audio settings within the system preferences of your Mac.
Choose the Right Recording Software:
- Select a screen recording software that offers audio configuration options.
- Ensure your chosen software allows you to capture system audio or external sources if needed.
Use a Quality Microphone:
- Invest in a good-quality external microphone for clearer and more accurate audio capture.
- USB or XLR microphones often provide superior audio compared to built-in laptop microphones.
Optimize Microphone Placement:
- Position the microphone close to your mouth for optimal sound pickup.
- Experiment with placement to find the sweet spot that minimizes background noise.
Adjust Input Levels:
- Check and adjust microphone input levels in your Mac's system preferences.
- Avoid setting levels too high to prevent distortion or clipping.
Reduce Background Noise:
- Record in a quiet environment to minimize background noise.
- Consider using noise reduction tools during post-production if needed.
Use Headphones:
- Wear headphones during recording to monitor and catch potential audio issues with system sounds.
- This helps you identify and address problems before finalizing the recording.
Record in a Lossless Format:
- If possible, choose a lossless audio format for recording to maintain the highest quality.
- Common audio formats like WAV or FLAC are suitable for preserving audio fidelity.
Monitor System Resources:
- Check for any applications or processes that may be consuming system resources during recording.
- Close unnecessary applications to ensure your system has ample resources for recording.
Test and Adjust:
- Conduct test recordings to assess and adjust audio settings before your final recording.
- Make adjustments based on the test recordings to achieve the desired audio quality.
Consider Post-Production Editing:
- Use video editing software to enhance audio during post-production.
- Apply equalization, compression, or other audio enhancement tools if necessary.
By paying attention to these tips, you can significantly improve the audio quality of your screen recordings on Mac, providing a more professional and engaging experience for your audience.
FAQ
Can I capture my screen in HD?
Yes, the majority tools for iMac and Macbook screen recording with audio provide high-definition videos along with crisp sound.
Can I add annotations while recording my screen?
Some third-party applications offer real-time annotation features, allowing you to enhance your screen recordings with dynamic and informative elements as you go.
What format can I save my recordings?
The format options for saving your screen recordings vary, but commonly supported formats include MP4 and MOV. Both have good compatibility with different devices.
Can I adjust the microphone input volume during screen recording on Mac?
Yes, go to System Preferences > Sound > Input, and select the device you want to use. From there, you can adjust the input volume to ensure it’s balanced with system audio for an optimal experience.
Why is there audio lag in my screen recording on Mac?
Desynchronization can be caused by high system resource usage or insufficient processing power. If your Mac is running multiple applications, this can affect the sync between the video and audio.
Conclusion
Knowing how to screen record on Mac with audio is an excellent way for capturing and sharing lectures, presentations, and memories. With the provided options, you should be equipped with the variety of tools to use for different occasions.
Overall, screen recording on a Mac with sound is easy if you take the time to understand the process. With the right software and sound control settings, you can create stunning videos for sharing or archiving in no time!